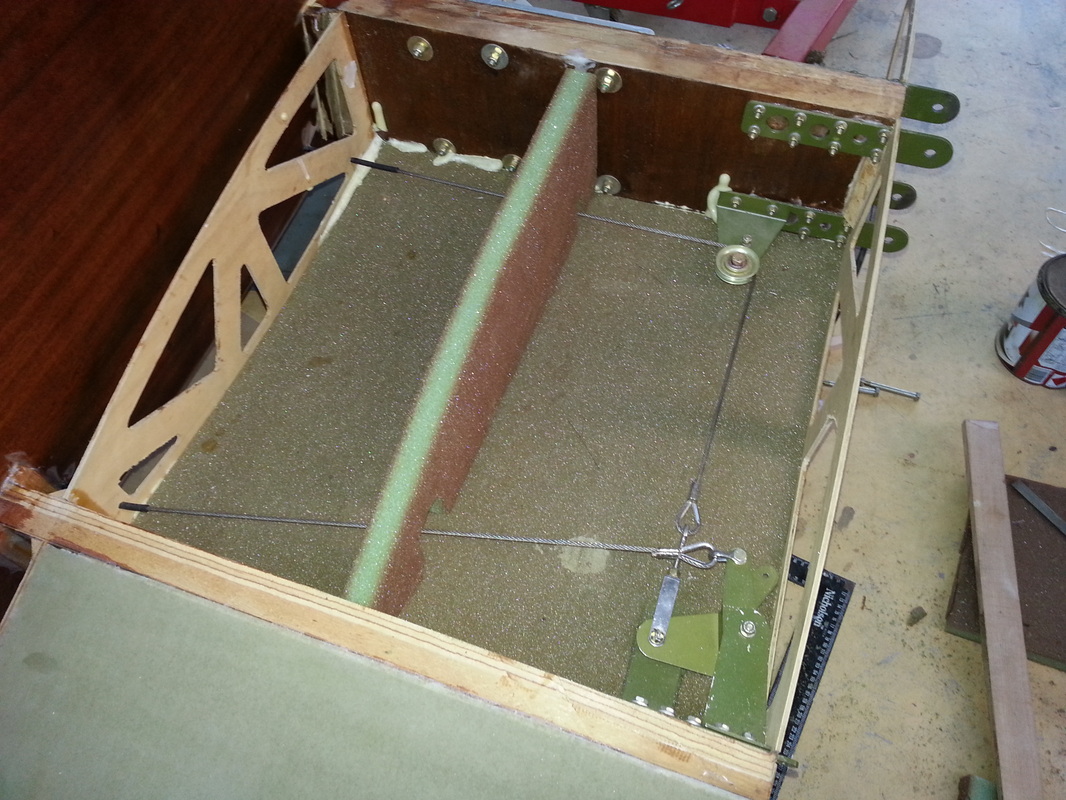
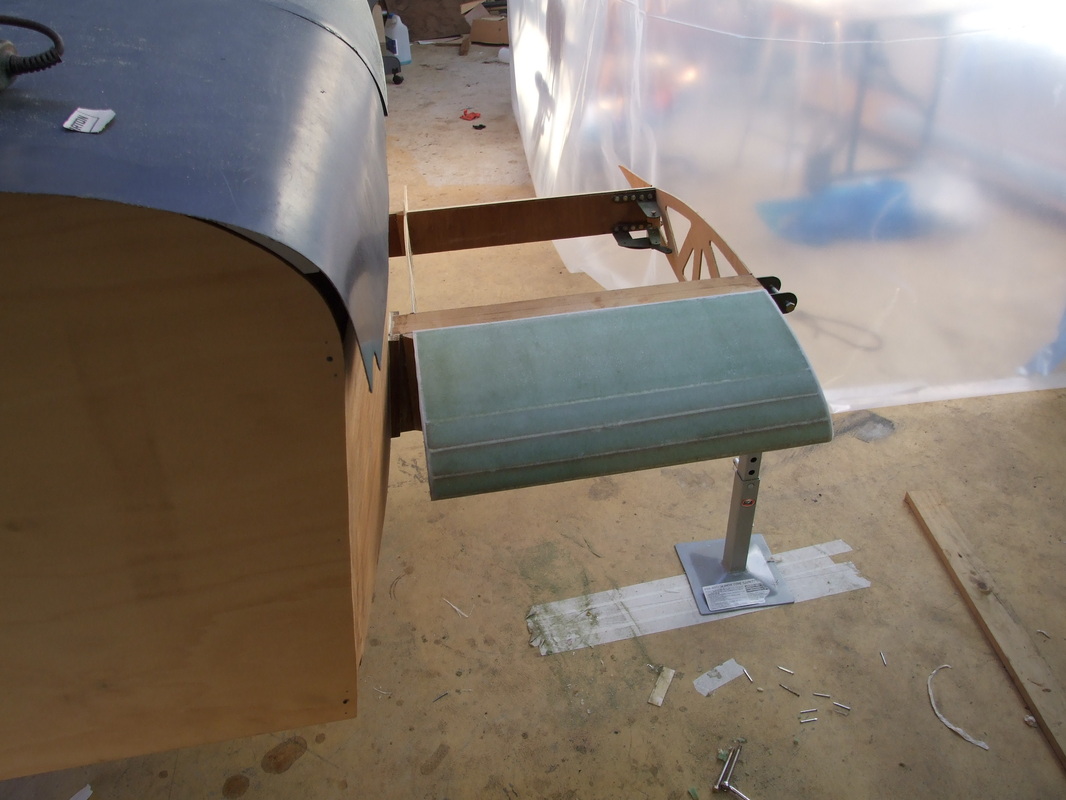
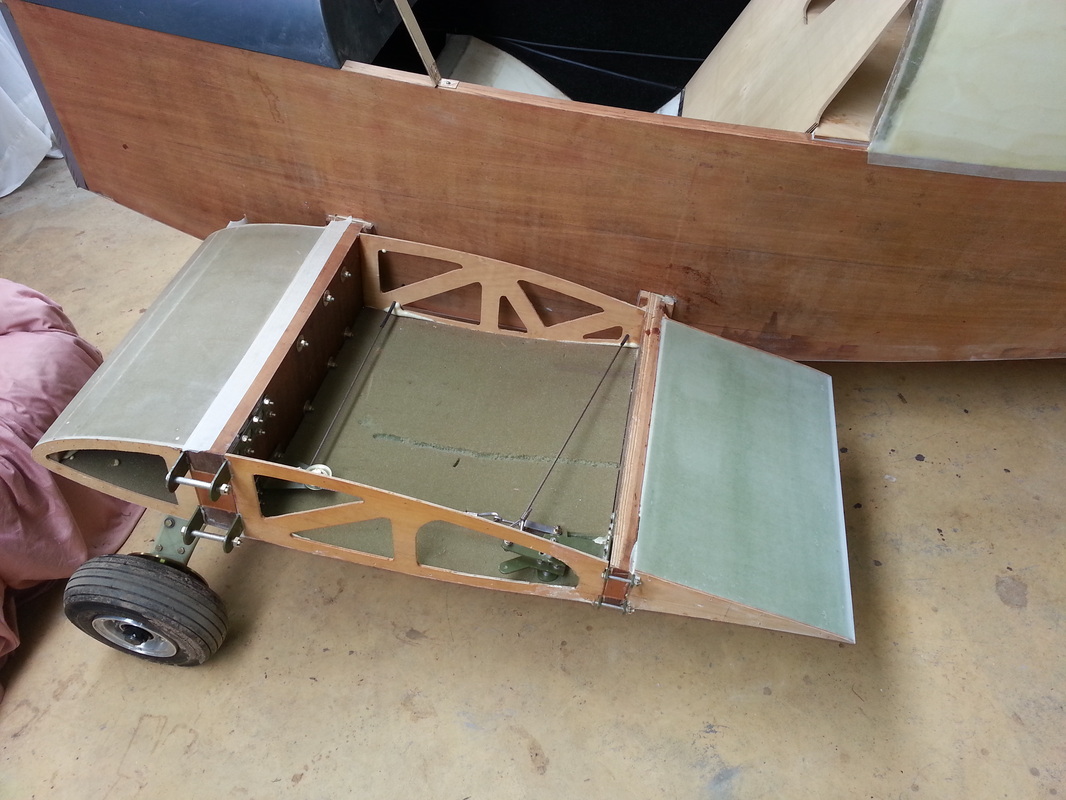
Finally received the landing gear kit supplied from NVAERO, very happy with the kit. So now the work begins on the stub wings, following Mark Langfords lead, I had built the leading edges first, if the legs were in place I would not be able to shape the leading edges. masking tape was applied around the ribs and along the spar so the glass would not bond to the timber, then a brush of some mold release just to make sure it can let go from the tape, the glass was then applied and left to cure for 2 days.
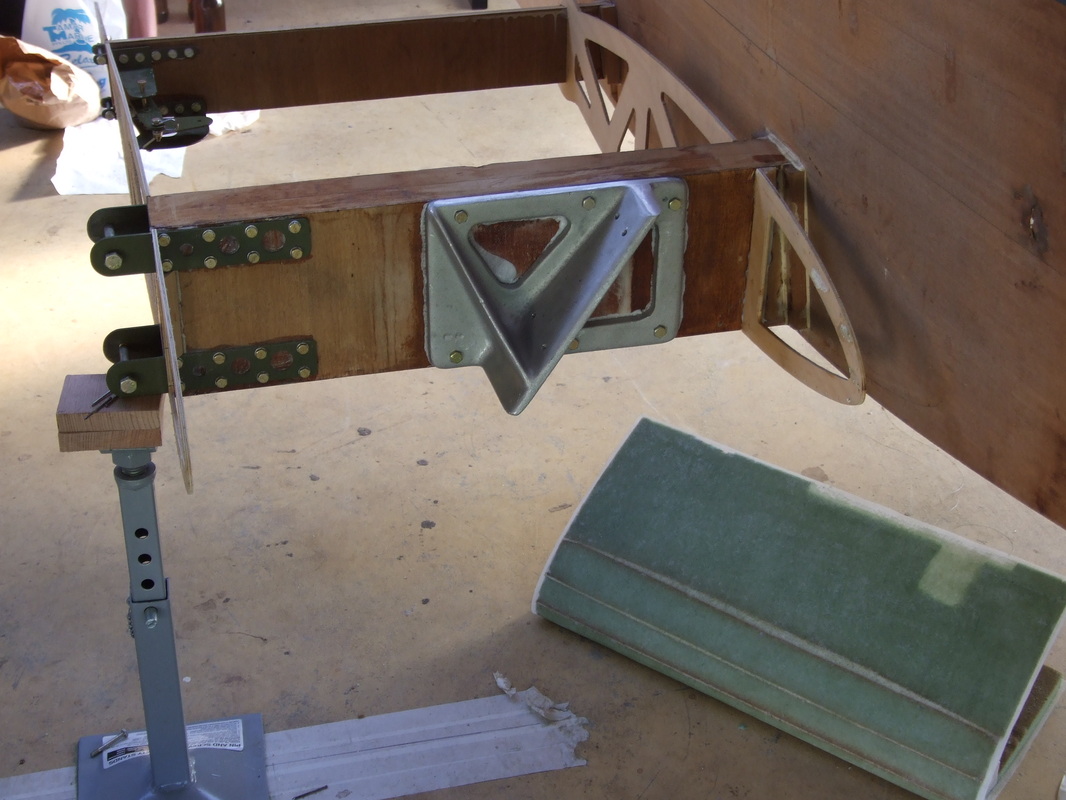
After the leading edges were shaped and glassed they were removed from the spar and ribs, the legs were then glassed as per the instructions for the landing gear, template was then made and the spar casting then drilled with the ply template so both the castings holes matched, lucky for me my WAF drill guide was wide enough to fit the spar and castings. Castings were clamped to the spars and leg angles aligned then drilled first with a 3/16 drill first through the spars with the help of the drill guide then re drilled with a 1/4 drill. The casting were then removed a small batch of flox was then made and applied to the face of the castings then permanently bolted to the spars.
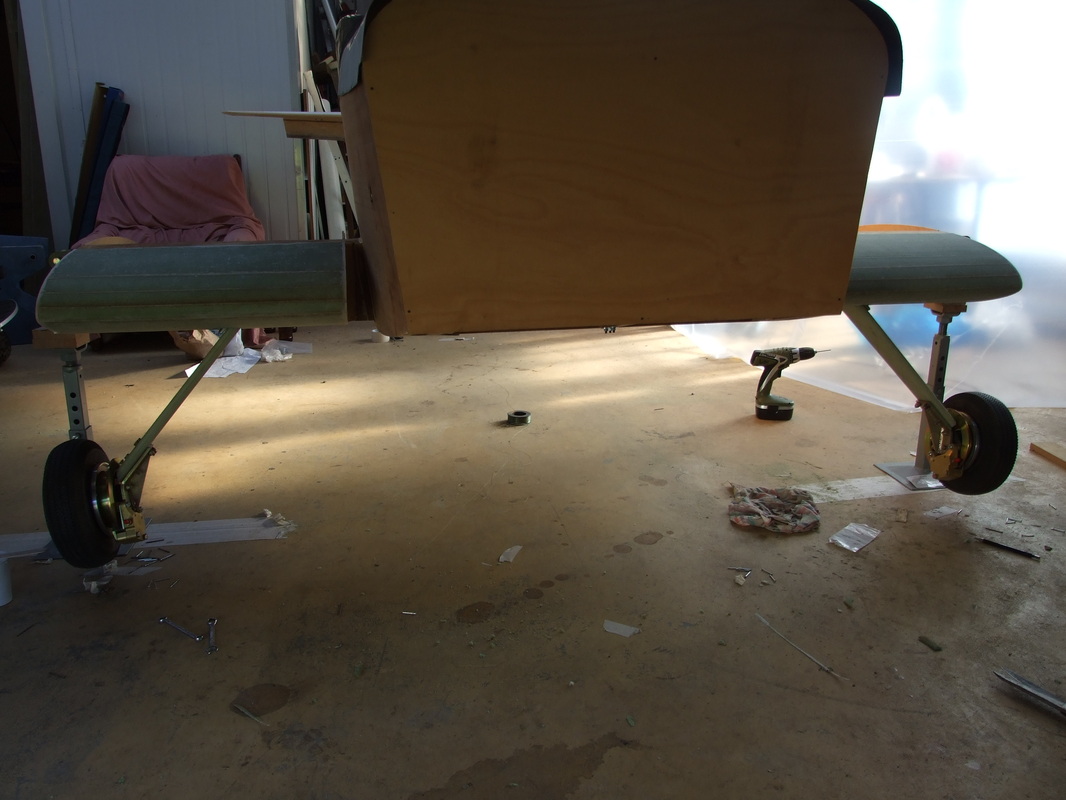
The legs were then aligned and jigged to the castings, drilled and temporarily bolted to the to the castings. A straight length of timber was used as a guide across the floor from leg to leg, square and centered and level to the fuse to get the alignments right. The axle castings were then aligned and clamped to the legs, the legs then removed from the spar castings and the axle castings then drilled. Axel and axle casting then all bolted together and legs bolted back onto the spar castings temporarily ready for floxing when I am ready, not going to do this just yet in case they need to be removed for any reason if more work needs to be done to the leading edges.
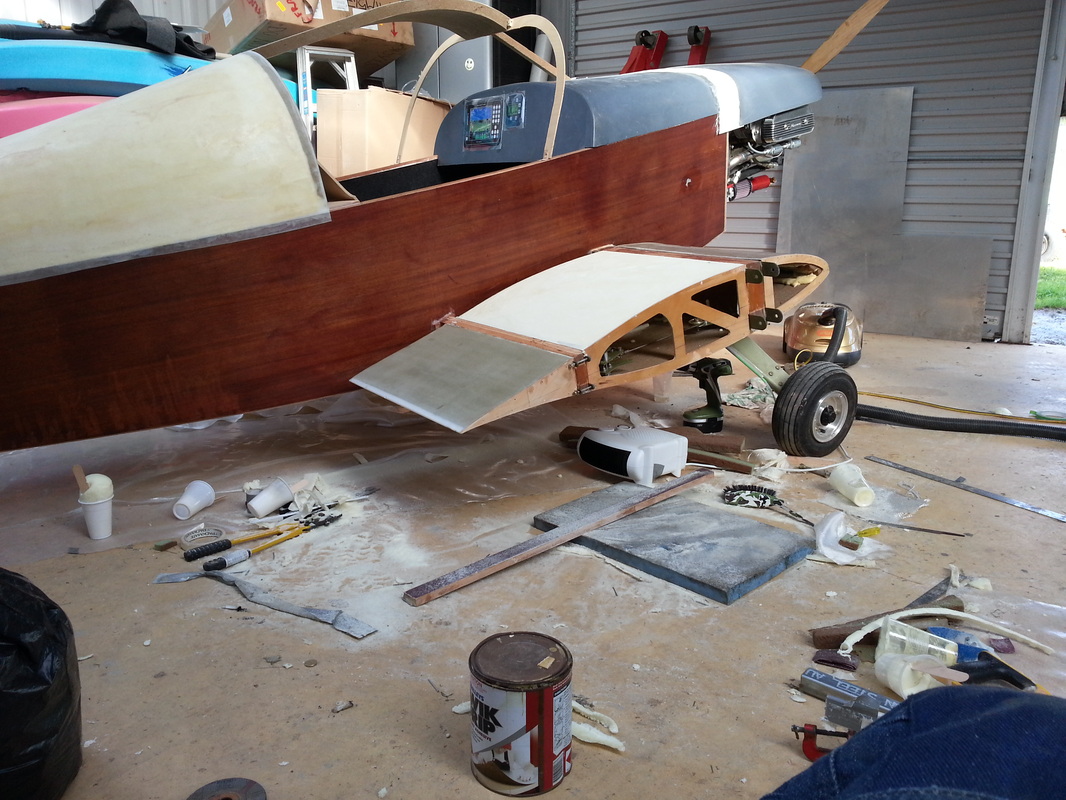
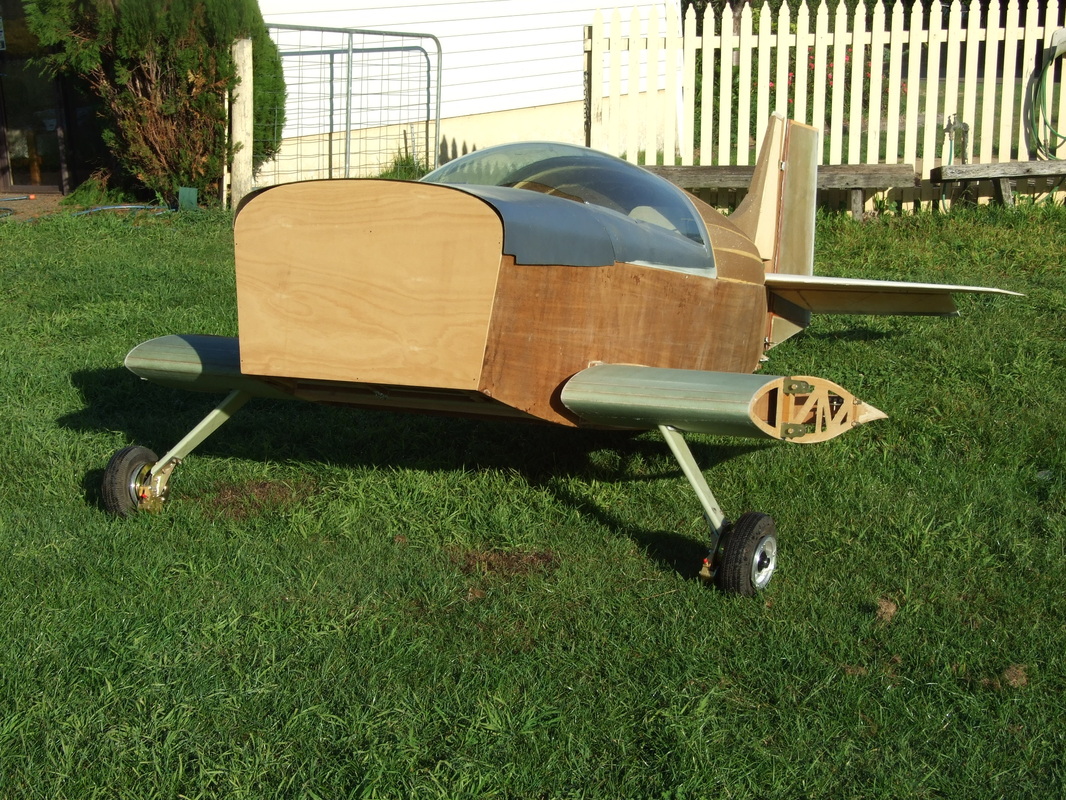
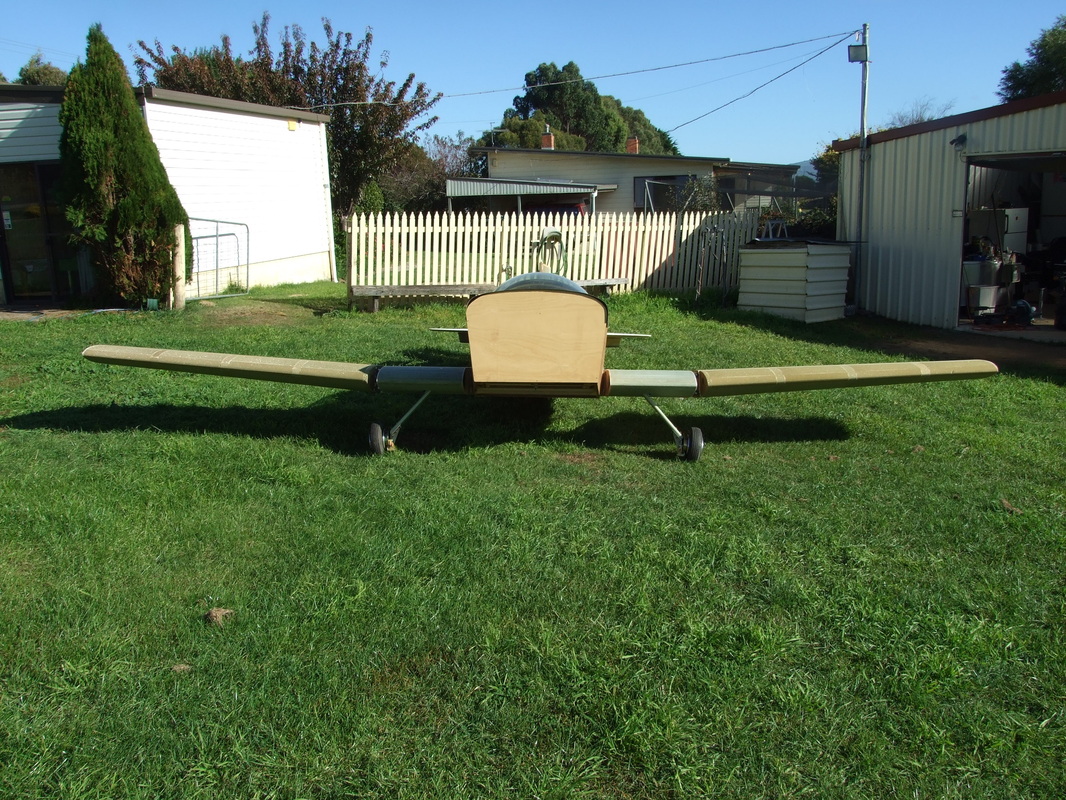
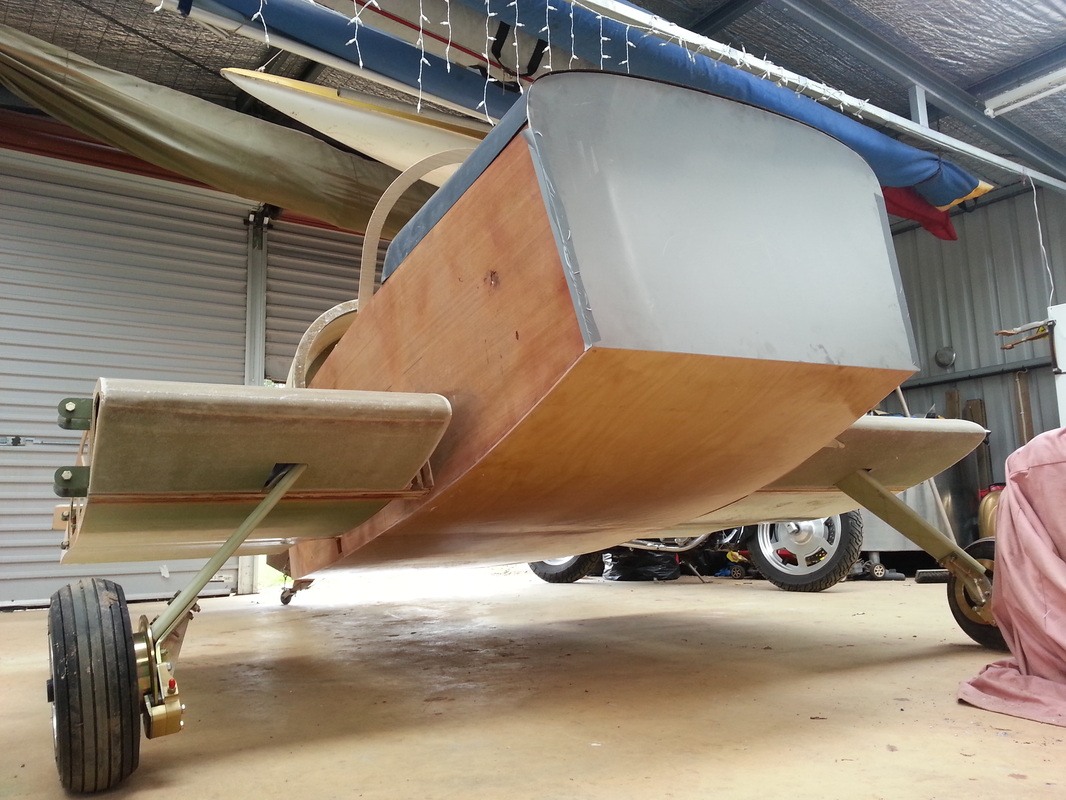
Now that I can sit her on her own feet she is really starting to look like a plane with a nice wide stance, kinda reminds me of a midget mustang.
After the leading edges were shaped and glassed they were removed from the spar and ribs, the legs were then glassed as per the instructions for the landing gear, template was then made and the spar casting then drilled with the ply template so both the castings holes matched, lucky for me my WAF drill guide was wide enough to fit the spar and castings. Castings were clamped to the spars and leg angles aligned then drilled first with a 3/16 drill first through the spars with the help of the drill guide then re drilled with a 1/4 drill. The casting were then removed a small batch of flox was then made and applied to the face of the castings then permanently bolted to the spars.
The legs were then aligned and jigged to the castings, drilled and temporarily bolted to the to the castings. A straight length of timber was used as a guide across the floor from leg to leg, square and centered and level to the fuse to get the alignments right. The axle castings were then aligned and clamped to the legs, the legs then removed from the spar castings and the axle castings then drilled. Axel and axle casting then all bolted together and legs bolted back onto the spar castings temporarily ready for floxing when I am ready, not going to do this just yet in case they need to be removed for any reason if more work needs to be done to the leading edges.
Now that I can sit her on her own feet she is really starting to look like a plane with a nice wide stance, kinda reminds me of a midget mustang.


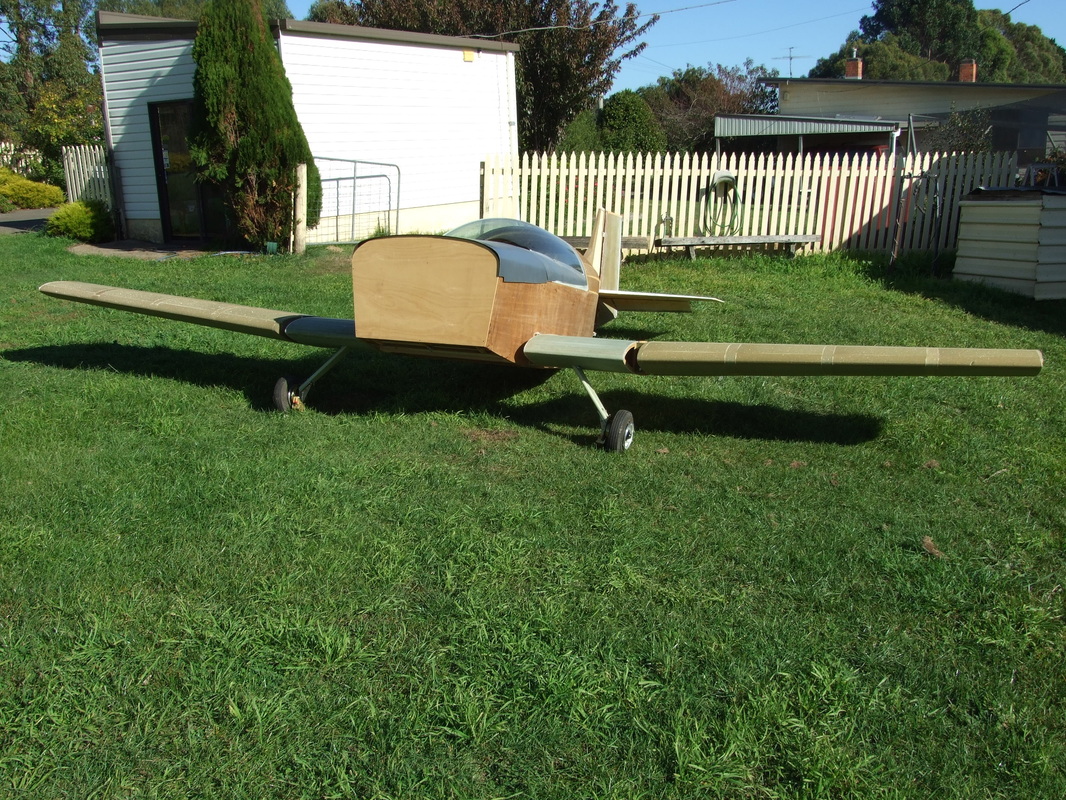
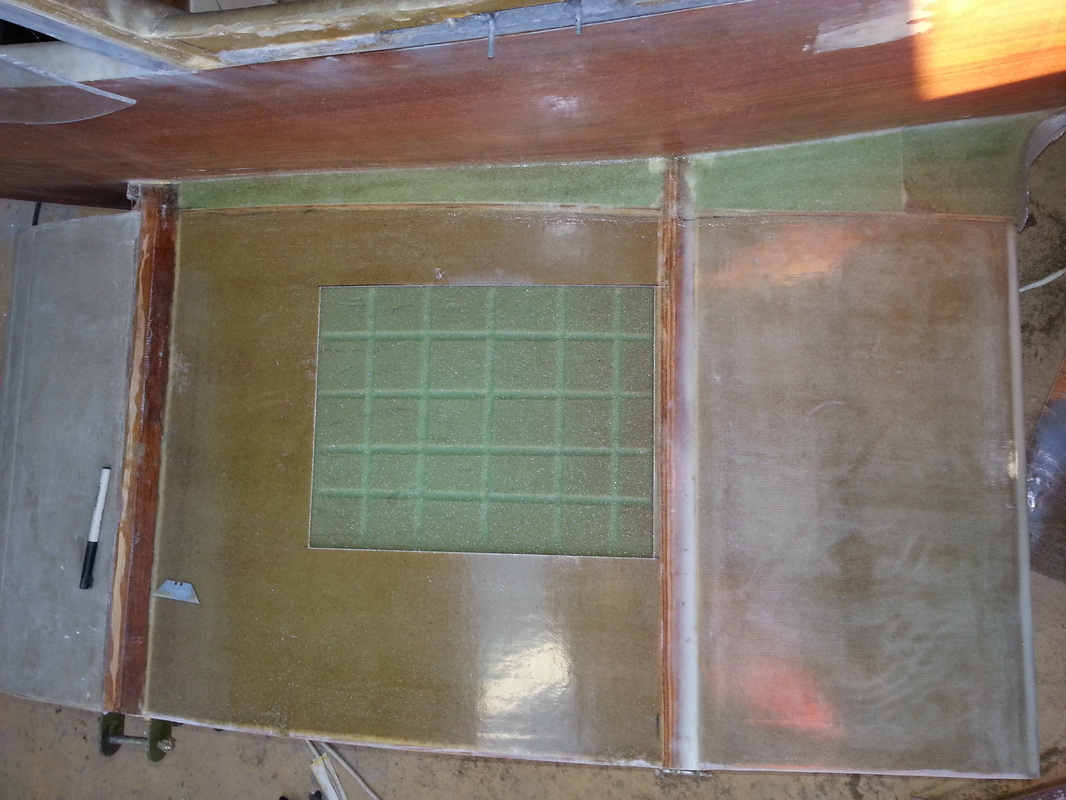
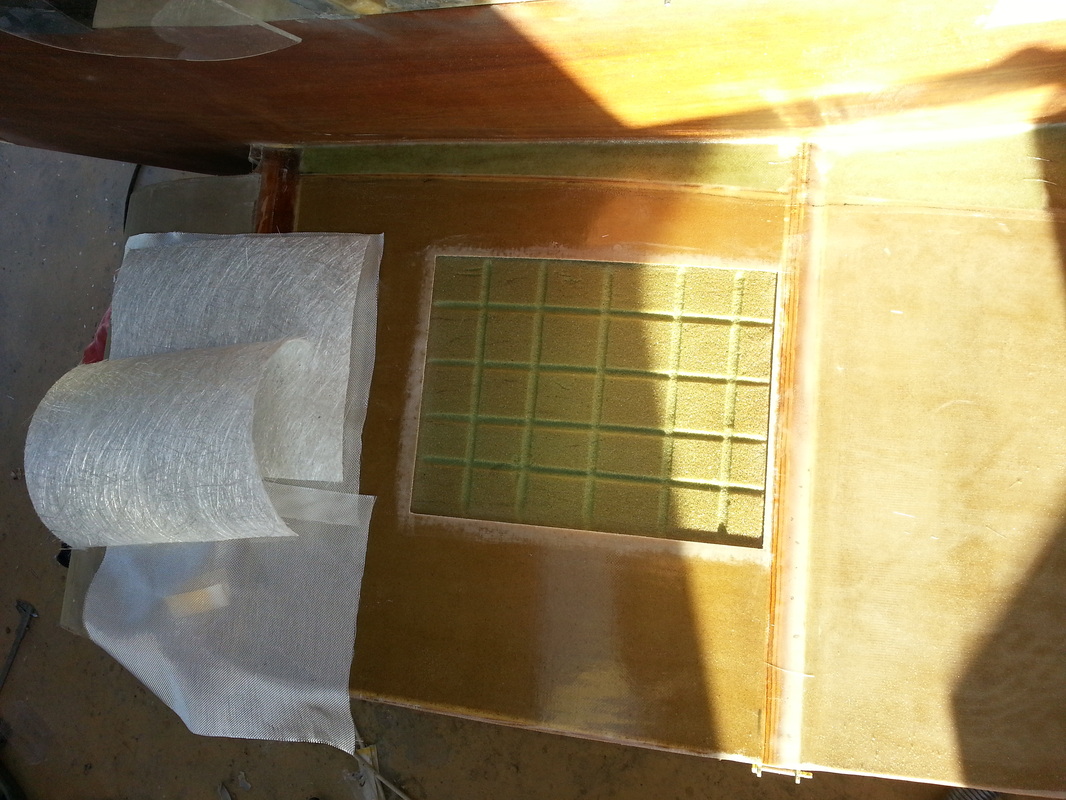
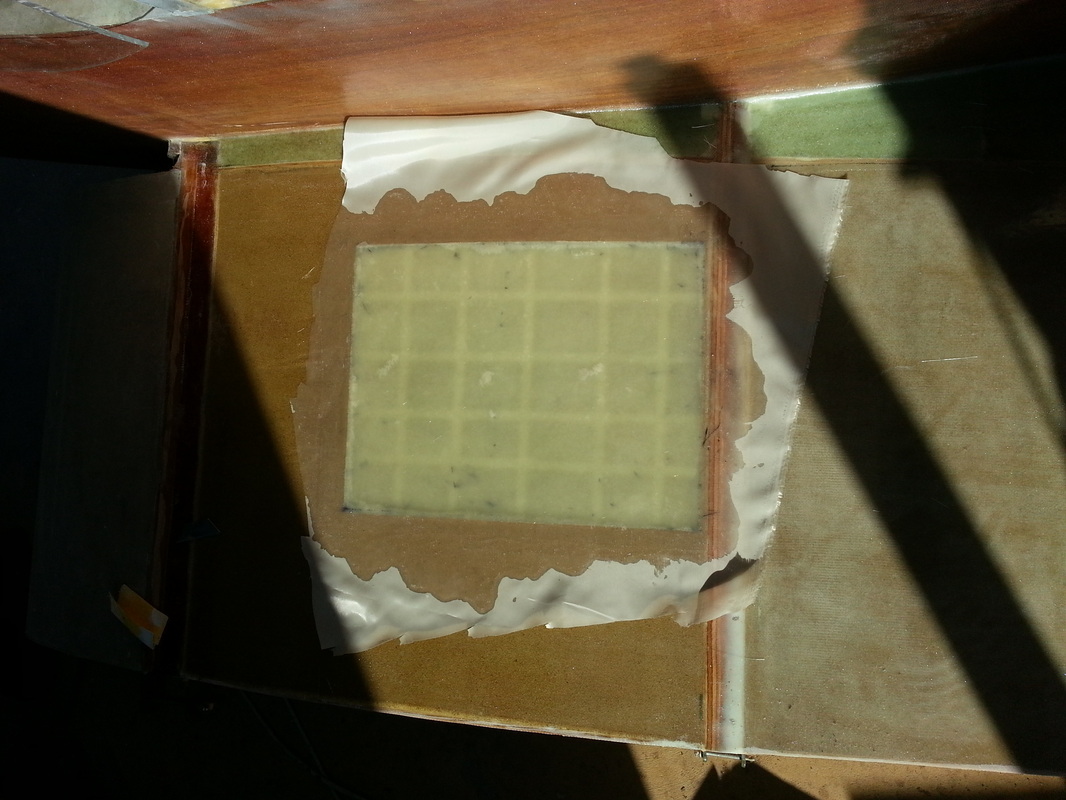
Stub wings are now under way 1" thick foam has been glued into place between spars and rib templates sanded to profile and glassed with a sheet of plastic over the glass this is a brilliant idea that someone had told me about. it saves a lot of work on filling and sanding as when it is set the plastic sheet peels of like it was held on by static and the finish is the same as if the plastic was still on there!
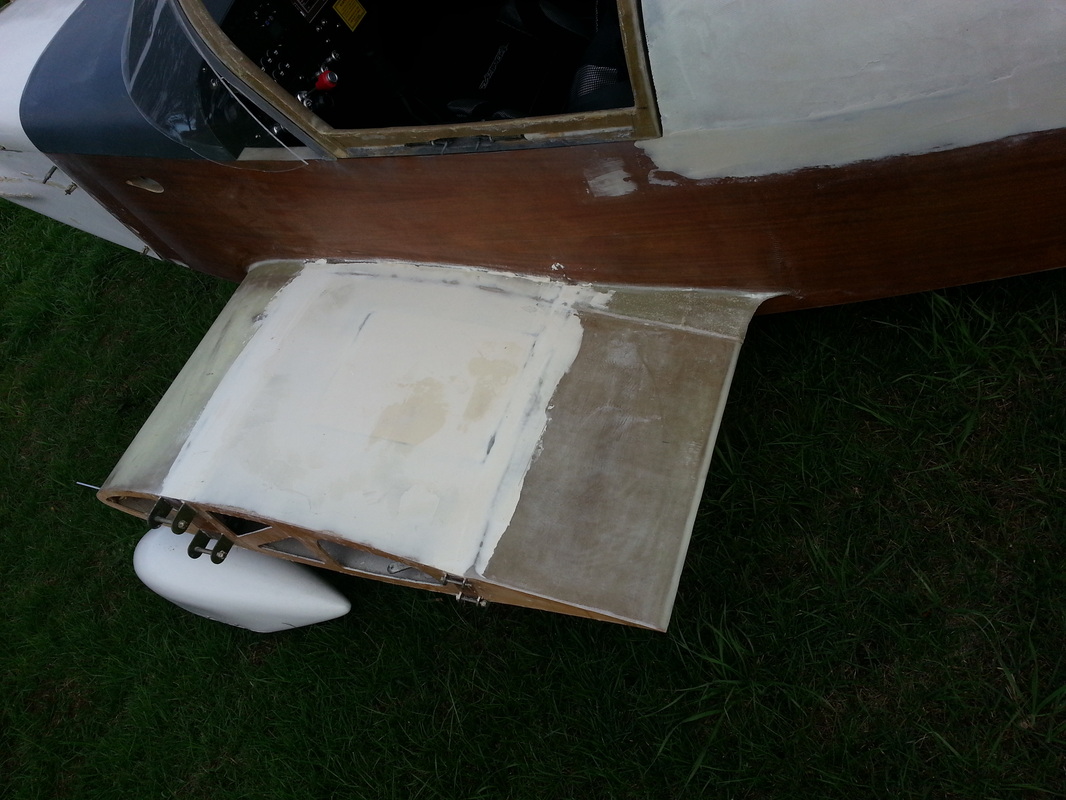
Here foam ribs were cut and glassed then trimmed to fit inside the stub wings. One rib of 1" for the stbd. side and two 2" thick foam ribs for the port side for the wing walk area these were floxed into into place and two layers of glass to reinforce.